The Shapeflow 3D iOS app is nearing feature completion. One big milestone was reworking the user interface concept. It is now easier to add additional features and the handling on the smaller screen devices (e.g. iPhone) has been improved. The other features that has been on my list for quite a while were rendering override modes as well as an extended material system. As a result, the app now features a U/V and stripe light diagnostic mode.
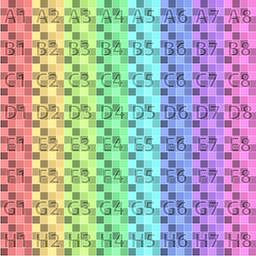
U/V Reference Texture Overlay
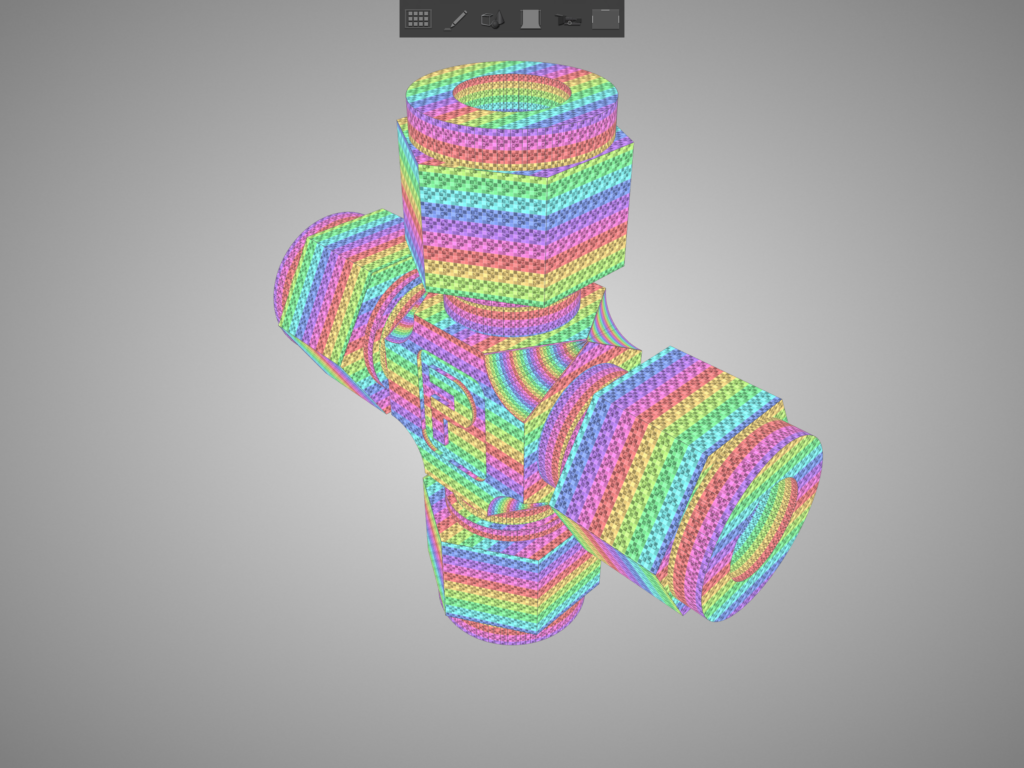
A common data prep operation is to check the texture coordinates (U/Vs) for a mesh. This becomes especially important if one plans on doing texture painting or baking shadows. Typically, this is done by applying a reference texture map which come in various forms. They usually consist of some type of checker board but otherwise there is a lot of variance. Whether it is best to use a diagonal color gradient, a vertical one, keep it to grayscale or use some form of circles is pretty much a matter of taste. I did some research on the internet and then used Adobe Illustrator to create a texture that can be embedded as a default into the app. While it seems trivial at first, it is surprising how many different considerations go into creating such a texture.
But how to apply it to the model? A lot of programs require the user to manually create a new material, set the texture and then apply it to an object. However, this a) can be quite tedious (especially if there are multiple material on a single mesh or a larger number of independent meshes) and b) requires the user to re-assign the proper materials later on. So instead, I added the capability to give each view in the render layout a global override material. If it is set, the renderer uses this material instead of the material assigned to a mesh which means the user scene remains completely unchanged. So activating/deactivating is now a matter of tapping a button.
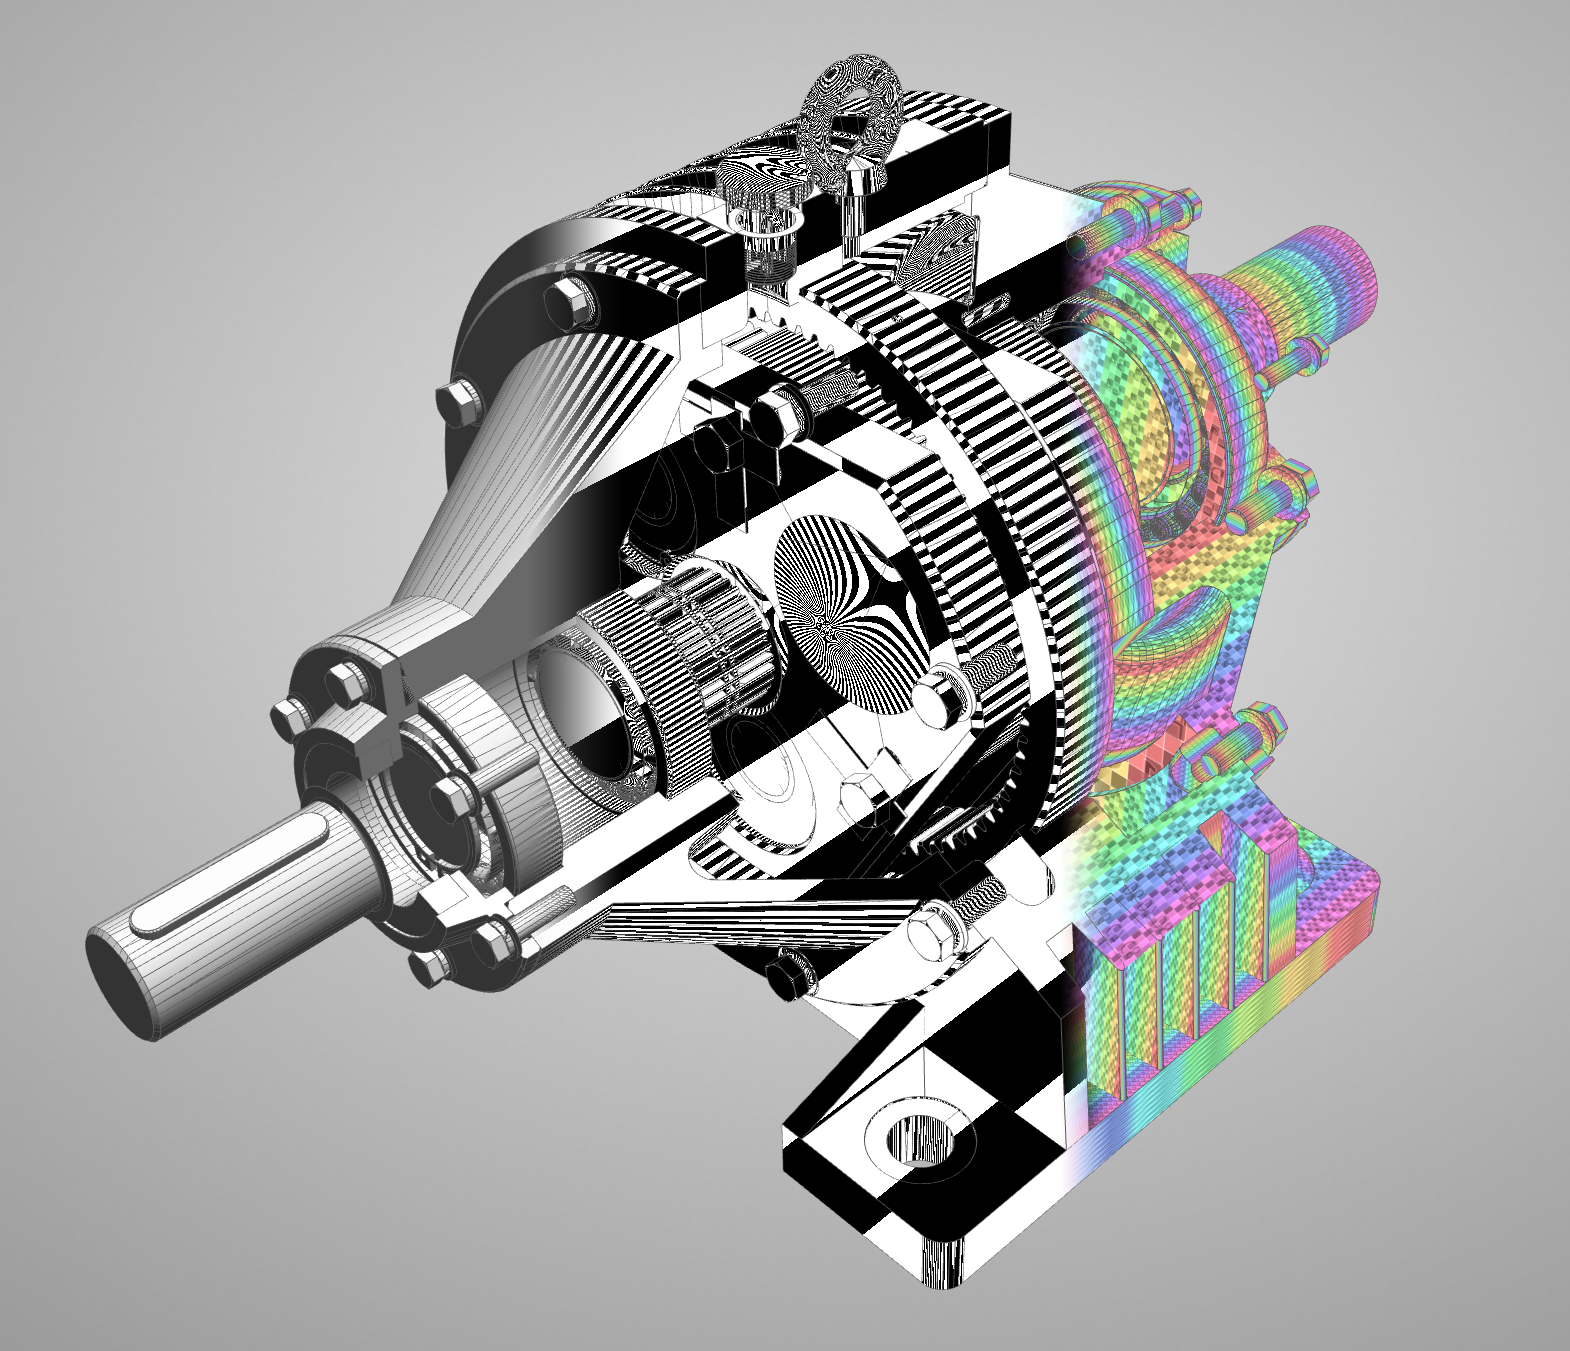
Stripe Light Shader
Using the view’s new override material capability made it easy to add another highly useful feature: diagnostic stripe lights. The origin of this is that car assembly lines use an arch of neon light build around the assembly line to do final checks on a car’s lacquer. The bright lines make it easy to spot any dent or other imperfection in otherwise smooth surfaces.
In computer graphics, a stripe light is great to find inconsistent normals. While such normals may not be noticeable in normal shading, they become an annoyance when using any kind of reflective material or a material with a specular component. As an example, take a closer look at the following image:
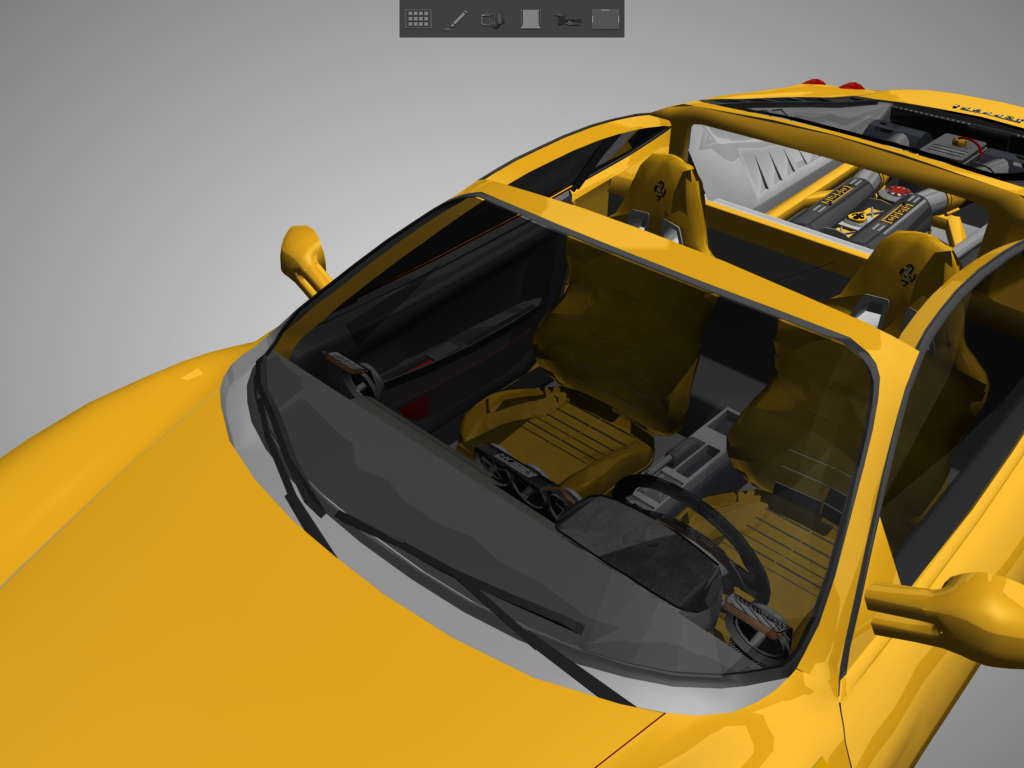
It is easy to overlook but the specular reflection in the bottom right corner of the car glass abruptly changes its intensity as it goes from one triangle to the next. The same problem is hard to overlook when using a stripe light:
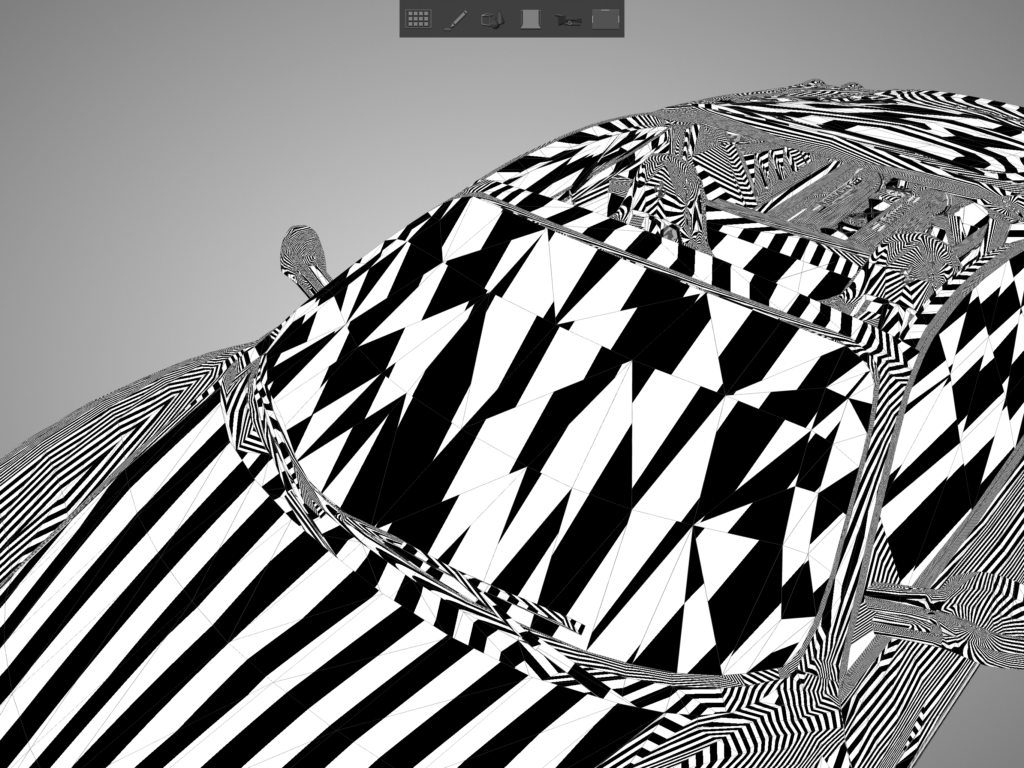
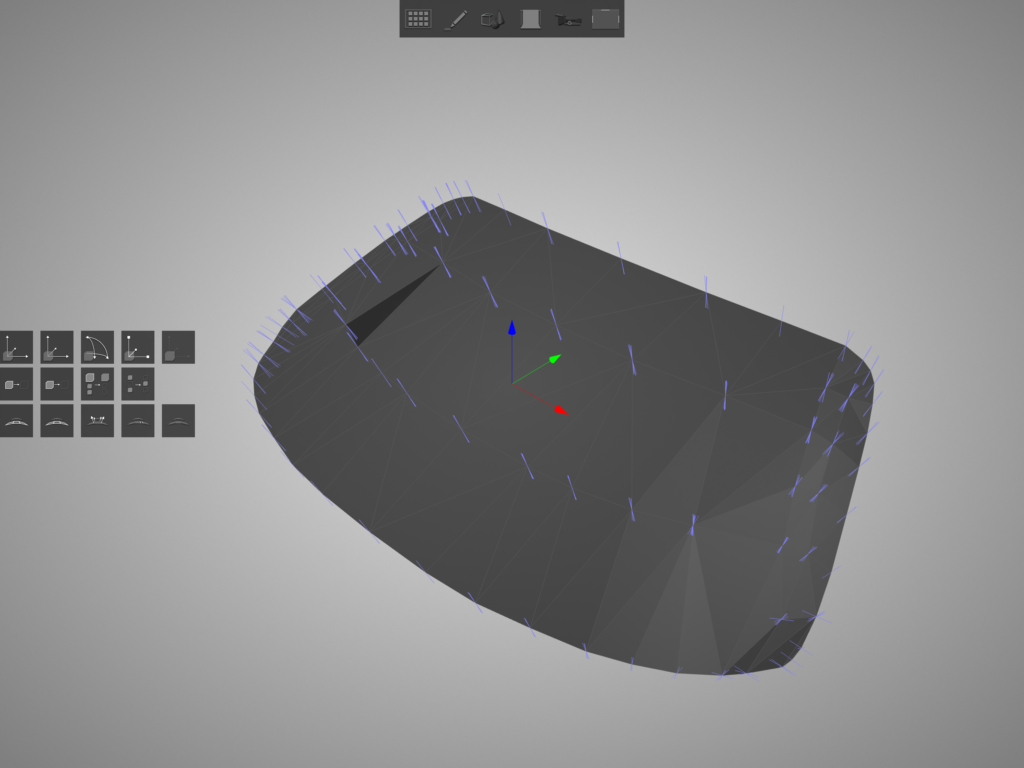
While the hood and side mirror casings show smooth lines, the stripes on the window shield are completely broken. When activating the normal visualization we in fact see that the COLLADA file contained per-face-per-vertex normals and they were inconsistent here.
The stripe light is for now implemented as a rather simple shader. However, it has not been adjusted for anti-aliasing yet which will be a bit tricky to do but shouldn’t take too long.
Testflight Beta Testing
Finally, I’ve created an app icon and setup the deployment process for the Apple AppStore. A first test build has been send to some key users using Apple’s TestFlight app which seems to work great! There were quite a number of code signing problems and various framework linking and AppStore validation problems and it’s good to know that now everything is basically ready for sending the app to Apple.
However, that is still a couple of weeks off. The tessellator still has to be further improved, error reporting and extended and so forth. But the main features should now be in place.

Leave a Reply