Well, here is something I wanted to do for a long time: create my own surroundings. And the first step for this is of course to create a 360/180 panorama image to use as an env-map. After some unsuccessful first attempts, I finally managed to get a decent result. So here are a couple of tips for anyone else trying to do this.
Equipment
First of all, lets talk equipment. Here is what I used:
- Canon 550D (also known as Rebel T2I)
- Canon 10-18mm IS 4.5-5.6 ultra wide angle lens
- a Manfrotto 190XPROB tripod plus Bazooka Bag
- a Nodal Ninja 3 Mk II panorama tripod head
- Canon 60D cable release (optional)
- PtGui Pro as stitching software
- Affinity Photo for processing
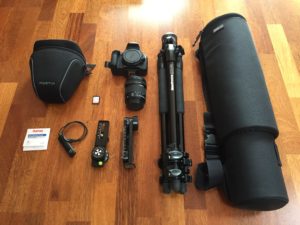
The camera itself is nothing special, any reasonable DSLR or other camera will do as long as it supports bracket exposures (for generating HDRs) and full manual mode. When it comes to lens, especially on a non-full-frame camera where the crop factor applies, going wide reduces the number of images that have to be taken. I’ve decided against a fisheye lens because they were a) more expensive and b) a “normal” lens is much more versatile. The 10-18mm IS is particularly nice as it’s fairly cheap and has a surprisingly good image quality. The cable release is not strictly necessary but is a nice bonus to reduce camera shake.
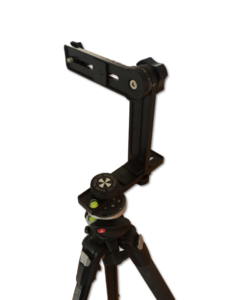
The Nodal Ninja is the first piece specifically for panorama creation. Without a nodal head, the camera will rotate around some arbitrary point and parallax occurs. This makes it hard to stitch images consistently. With a nodal head, the camera can be slid forward/backward to a point where no parallax occurs when rotating the camera. Unfortunately, this point is unique to each lens/camera combination and has to be experimented with. Since I’ll only be shooting panoramas with the ultra wide lens and I only have this one body, I did this once at home when the Nodal Ninja arrived and the used the included clamps to mark down the correct positioning. If found this tutorial on youtube to be the most helpful to figure out the process.
Shooting the Images
Planning & Setup
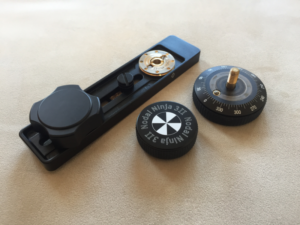
One important decision is how many images one will take. The more images you take, the more overlap between images exists and the better the stitching will work. However, more images require more space and more time. The last factor is quite important, because depending on the wind, clouds will move, the light situation can change or some car or bird might get into frame. For my combination, I’ve setup the Nodal Ninja to use eight stops when doing a full rotation.
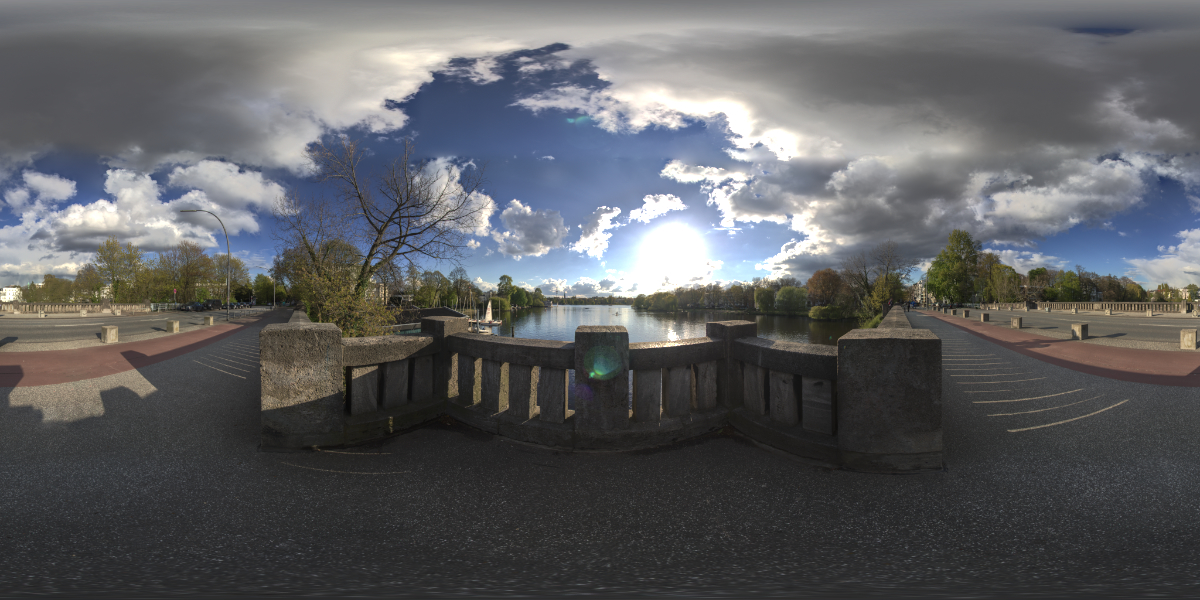
The next question is how many rows you need. With a full-frame camera and a fisheye lens, it’s possible to cover the whole sphere with just six images:top, bottom, front, back, left, right. With the 550D and the 10-18mm, I need 8 images to go around and have at least some sensible amount of overlap plus at least one image each for top and bottom. However, on a first attempt this did cut it quite close, so I opted for two rows of 8 images without an dedicated top/bottom shot. This worked well but did put the stitching line right at the horizon where it is quite noticeable. For the image in this post, I tried 3 rows of 8, with three exposures at each position. When shooting in crowded places – like the bridge in the image – it makes sense to catch some additional shots. These will becomes important during stitching later on.
While we’re at it, put another SD card on your shopping list. Shooting these many images in a single location fills up any SD card quickly. For the image above, I’ve used 114 (!) images (in sets of three exposures) shot in RAW which take up a total of 2.85GB!
On Location
Once you have chosen the right spot, setup your tripod. The Nodal Ninja has a levelling indicator built in which makes it easy to keep everything level. Choose your primary direction, put the camera in AV-mode and take an exposure reading. Memorize the aperture and exposure time, switch to manual mode and set the same settings. Focus the camera and then turn everything fancy off: auto focus off, auto white balance off, ISO fixed (the first few times I had this in auto mode without noticing). You want all images to be taken exactly the same. Then setup exposure bracketing to be able to create an HDR later on.
When you do the actual shooting, move quickly but without haste. When you’ve changed to a new orientation, wait until the camera settles down and use a cable release if available (or a 2 second timer if not) to reduce camera shake.
Getting in the Way
The tricky part – apart from working quickly enough so things don’t move too much – is to get out of the way yourself! Especially if the sun is low, you and your tripod cast long shadows that are a pain to remove in post processing. It helps to crunch down or move off to the side and use the cable release when taking the bottom row of images. This minimises the amount of shadows that end up in frame and need to be fixed in post. For the orientation facing away from the sun, it makes sense to take two images: one where you stand far to the left of the tripod and one far from the right. Again, this will become relevant during stitching.
Finally, you should catch an extra shot where you move away the tripod slightly. Florian Knorn has a great technique how to do this by extending one of the legs of the tripod. What I learned is that with all of this, you should keep in mind where the sun is when doing this or otherwise you get rid of the tripod but cast a huge shadow instead. In a similar vain, it makes sense to avoid bright clothing when shooting in reflective environments!
In general: Avoid days with lots of wind or where the light changes quickly (e.g. trees moving, clouds).
Pre-processing the Images
This is not necessarily required but it makes sense to run your images though Lightroom or some other tool that can do a lens correction and remove chromatic aberration. I haven’t done this for this particular image but the chromatic aberration (i.e. color shift) was clearly visible when zooming in.
Stitching the images
For simple panoramas, Photoshop or Affinity Photo will do the trick. However, for shooting 360/180 panoramas, it requires a more powerful tool. I did some quick research and settled on PtGui Pro because it seemed to be what everybody else was using. To be more precise, I first used the trial because I wasn’t too sure about it. It’s fully functional but adds watermarks, which is great when you’re just trying to get a feel for stitching panoramas.
PtGui has a sort of wizard: load the images, let it create control points automatically and done… well, the first results I got were pretty bad and it took me a while to figure out why:
- The control point generation will look for distinct points that it can match in multiple images. Your shadow and tripod will be in A LOT OF pictures! Unless you tell PtGui to ignore those parts, it will happily use them for matching and calculate incorrect alignments!
- Things move. Branches of trees moves, people move, waves move, clouds move, shadows move, etc. I ended up removing the majority of control points in the top half of the image because PtGui thought it had found a great match between two twigs in some random tree that of course looked completely different in the next image.
- With ultra-wide lenses, PtGui incorrectly assumes – based on the large opening angle – that they use a fisheye projection although they are rectilinear.
- I had to enable the other lens optimisation options (a, c, shift, shear) or otherwise the fit simply never got perfect.
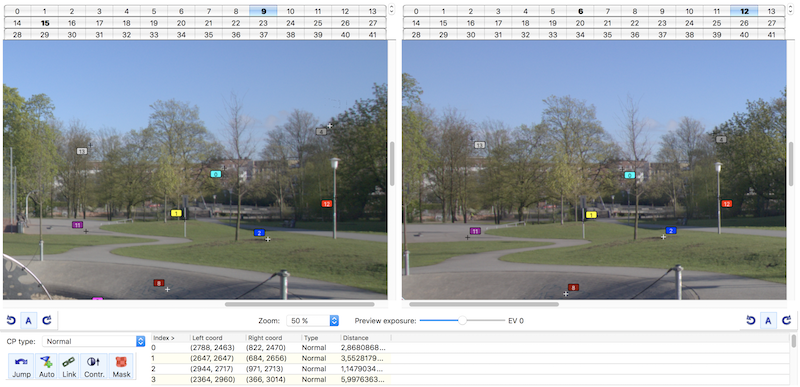
As a result, I’ve changed my workflow:
- Load all the images of a location into a new PtGui project. Make sure that always have triplets of exposures.
- Switch to “Advanced” mode
- If you use a ultra wide-angle, non-fisheye lens, go to the lens setting tab and change from fisheye to normal lens.
- On the image parameter tab, make sure that the three exposures of a single orientation are linked (i.e. the link checkbox is unchecked for the first image and checked for the next two images of every set of three).
- On the exposure/HDR tab, active “group bracketed images” and “true HDR”.
- On the mask tab, go through all the images and use the red marker to mark all the parts that should not be used in the final image. This should include the parts where the tripod/nodal ninja ended up in the frame. If you did multiple tries for the same position, you can also use this to exclude moving cars from one image in the hope of the same part being captures by another image.
- Use Generate Control Points. Then go to the Control Points tab and select image 0 on the left side. On the right side, all the images that have control points for image 0 will be marked bold. Click through these images and remove any control points on moving parts (e.g. twigs, branches, clouds). Note: You only have to check every third image as control points are shared between linked images.
- Go through every third image and manually add control points. For this, look through the other images and try to find matching parts. Ideally, you find something where you can pin point the corresponding position down to the pixel. The corners of windows work great for this for example. Avoid using matches where you might be off by a couple of pixels.
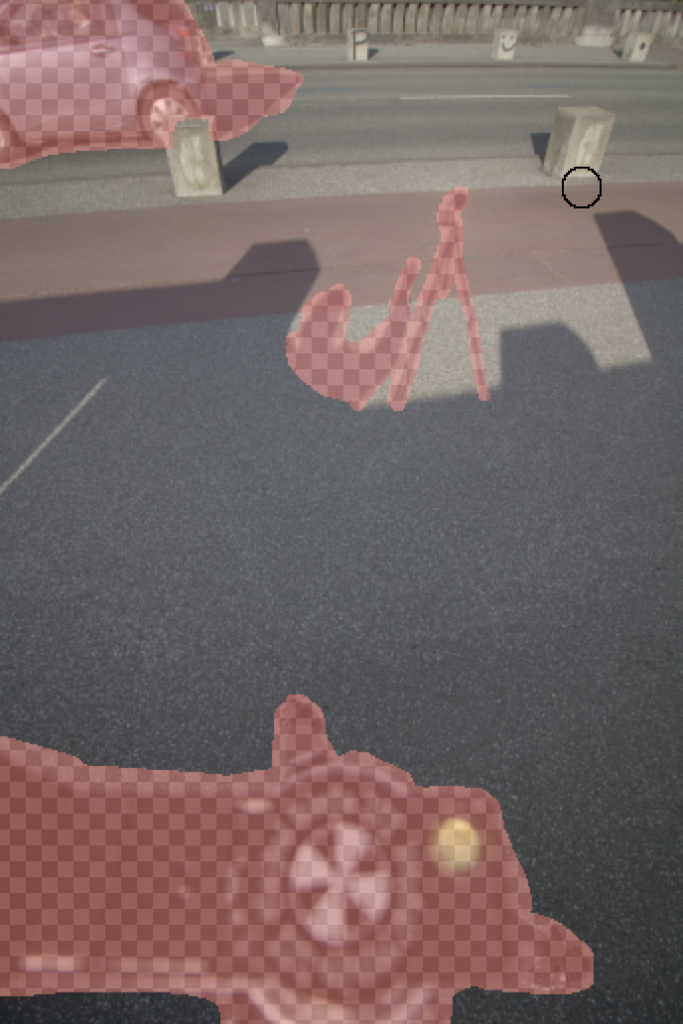
- In the Optimizer Tab, activate all optimisation options (a, c, shift, shear) except the last one and then press Run Optimisation. Note: If you have taken a nadir shot (e.g. the shot downwards – the “natural direction=nadir” – with the tripod moved, remove the check marks under “use control points of” for these images for now. We’ll first do an optimisation without them and only later taken them into the calculation.
- Open control point table and check for the points with the biggest distance. Double click on it and try to fix the problem. You might also consider removing it completely and adding better points. Note that errors can accumulate: There might be weird control point matches in a complete different part of the panorama which causes a slight incorrect rotation which in turn amounts to a large offset on the other side of the panorama.
- Re-optimize and re-check the control point table. Use the Panorama Editor and the zoom window to spot misalignments. Note however that sometimes the preview is incorrect and you have to render out a full panoramas and us the PtGui Viewer to find mistakes.
Using the Nadir Shot
If you were able to take a nadir shot (looking straight down with the tripod removed but the camera still being fixed at the same position in space), you can use the viewpoint correction feature in PtGui Pro to align the image with the rest of the images. Re-activate the “use control points of” check marks and also check the “viewpoint” box in the column in the left table on the Optimizer Tab. Set control points between the nadir images and the rest of the scene. Note that according to the PtGui Pro documentation, this only works correctly if all the control points lie in a plane!
Note: This feature is only available in PtGui Pro!
Vingetting and Blending
If you haven’t removed vignetting in a pre-processing step, go to the Exposure / HDR tab and hit “optimise now”. This makes the images blend over much more nicely.
Export and Fixing
Once the alignment was okay, I exported a 9182×4096 HDR and opened it up in Affinity Photo. Starting with v1.5, Affinity can actually use a live projection such that you can navigate in the panorama and do projection correct editing. Go to Layer, Live Projection, Equirectangular Projection. Then drag the canvas to look down on where the tripod is. Select the area with the lasso and then choose “Inpaint” which is roughly equivalent to Photoshops content aware fill (or use the healing brush for smaller areas). Do the same for any other areas (e.g. in the sky) where things need removal/fixup.
Once complete, either save the image as an HDR or use the tone mapping persona and export to created a JPG/PNG.
Generating Cube Maps
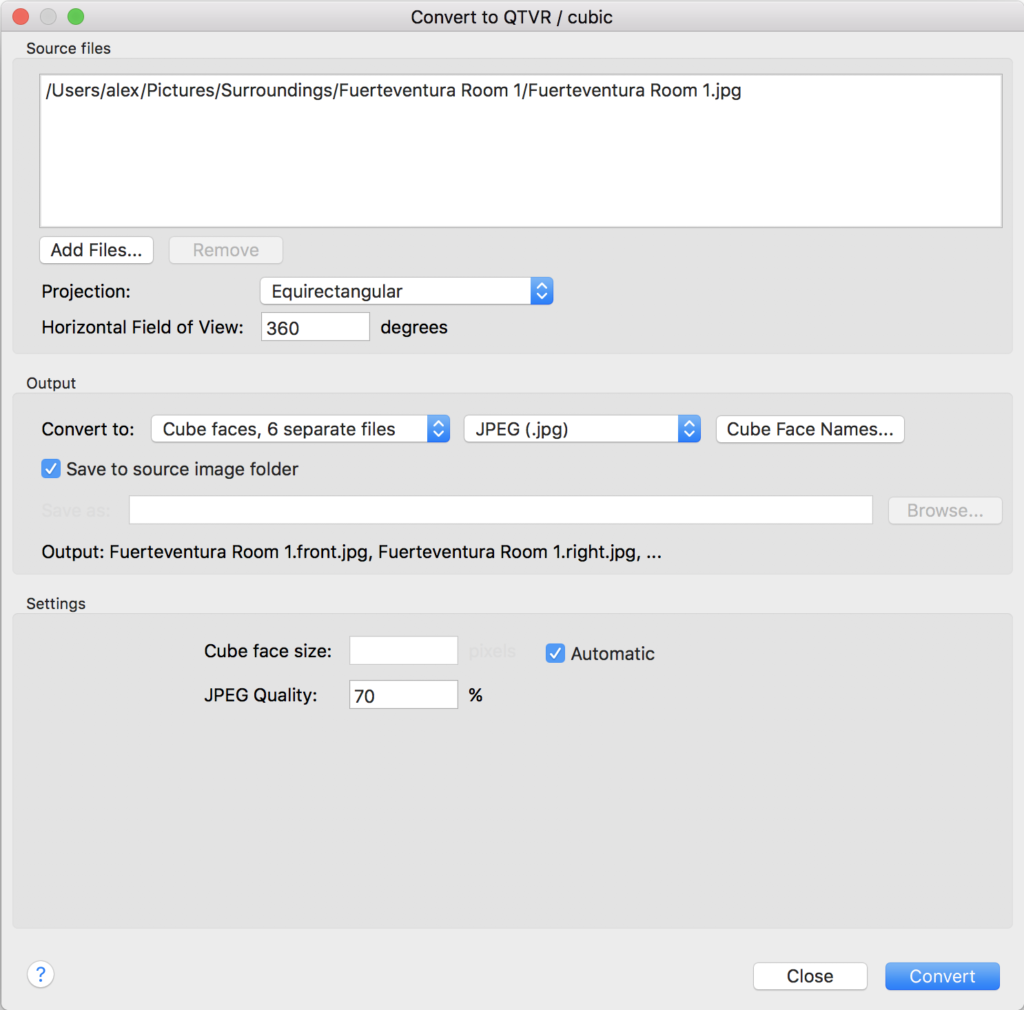
Unfortunately, neither Affinity Photo nor PtGui can create cube map sides. However, I’ve found 360toolkit which is an browser-based conversion tool.
Update Sep. 2017: Actual, PtGui can do this! It’s an extra tool inside PtGui and can be accessed via the main menu “Tools – Convert to QTVR/Cubic…”.
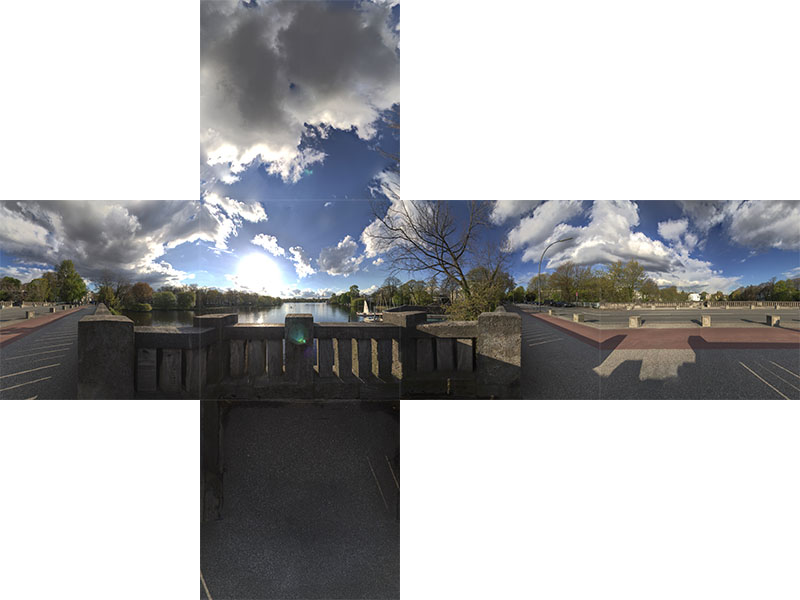
The resulting 6 six side-images assembled together look like this:
Summary
Well, it took a couple of attempts and it’s still far from perfect but I’m very happy how it turned out. In the past, I’ve mostly used env-maps from Humus, but shooting RAW and as HDR produces a much nicer quality in my opinion. Plus it’s surprisingly a lot of fun!
The image shown in this post is quite nice but there are still some noticeable inconsistencies where I haven’t figure out why PtGui cannot properly align the images. Also I relied on content aware fill instead of using a proper nadir shot. The next time, I would probably shoot some ground plates and additional textures to enhanced the environment by modelling parts of it. For example, in this panorama, it would be cool to roughly model the balustrade in 3D, project the textures on it and use the env-map only as a far off background layer.
Since I now have access to HDR env-maps, I also want to adapt the rendering pipeline to use HDR image based lighting instead of working with LDR images. Will be interesting to see how much difference it will make.

Leave a Reply