This one belongs to the chapter “it’s the small things that count”: On a number of occasions, the area of user input is not the whole render area – or in other words – the render area is larger than what is considered the view into the scene. This usually happens if some controls are drawn on top of the rendering area. Although the 3D scene can still be seen between the controls, when doing a “fit to view” the scene should not be positioned behind those controls as the user won’t be able to manipulate or properly see it there. What we need is an “overdraw area” where 3D content is rendered but no relevant parts are positioned there. In macOS, the typical use case is using an NSEffectsView. It needs content behind it to render its effect but the user cannot properly see what’s behind.
Motivation
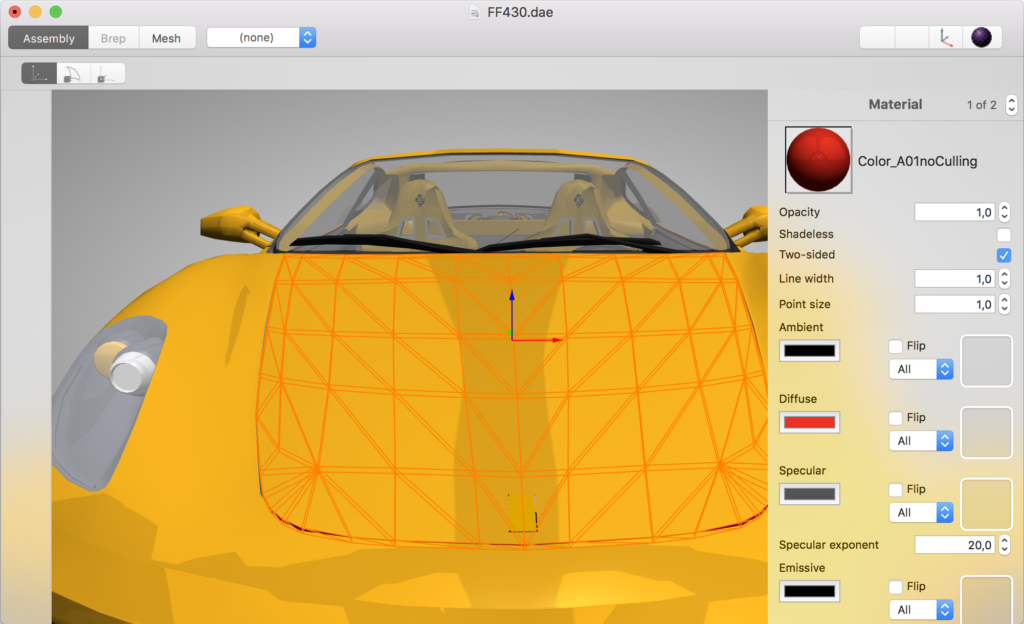
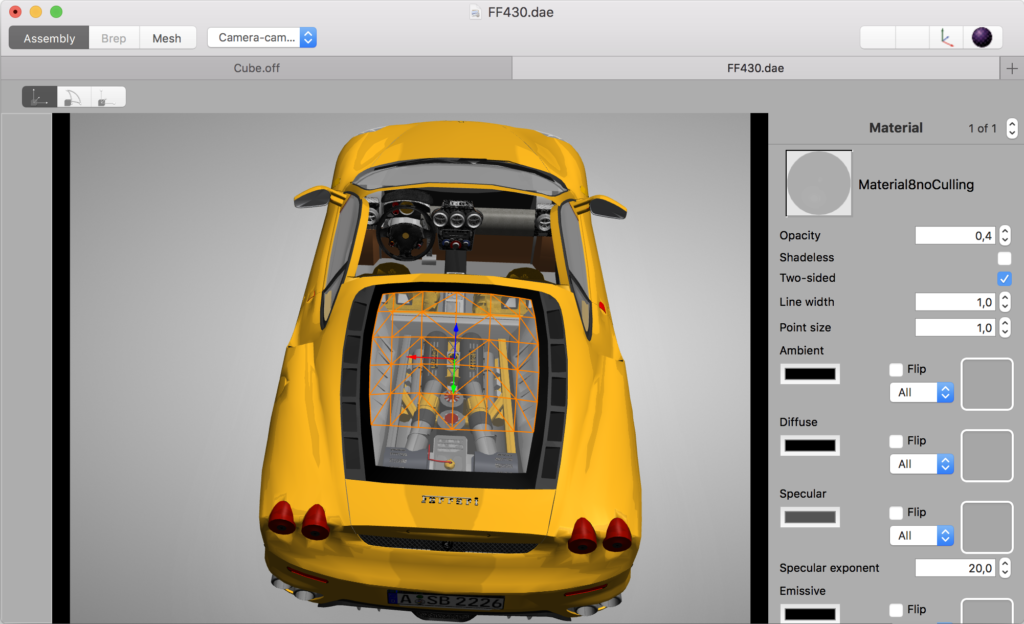
Let’s look at an example: In the following image, the user selected the hood and performed a “view all” operation. Note how the hood is centered in the render area. But since the control to the right is drawn on top of it, parts of the selection cannot be seen.
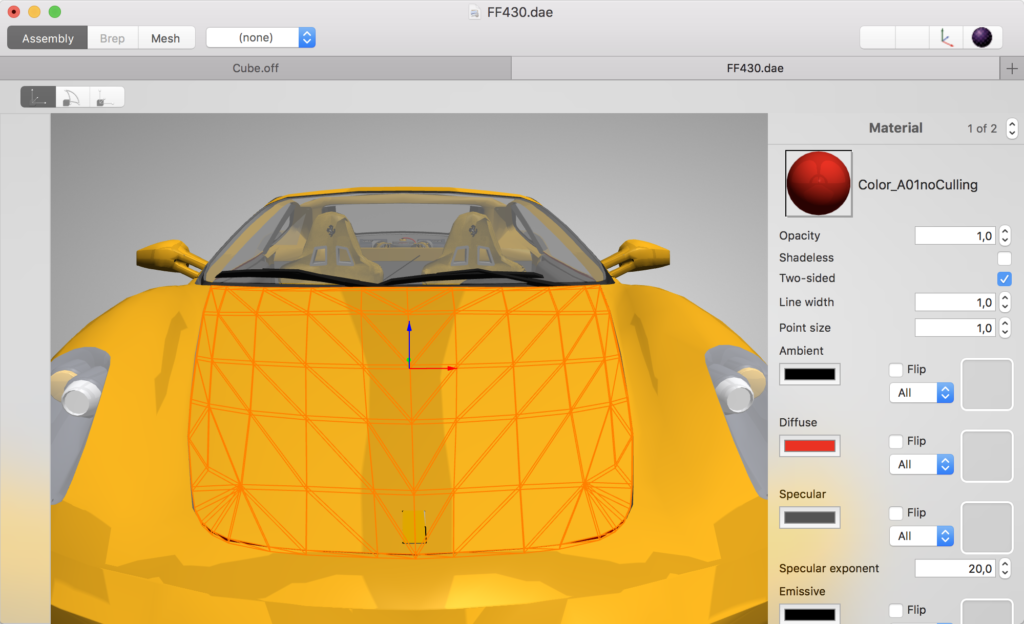
What we want however is something like in the next image. The object is centered in the interactive area. Note also how the viewpoint of the camera is also centered in the middle of the interactive area although rendering extends beyond underneath the controls. This no longer is a camera frustum which has a normal opening angle but a sheared version of it.
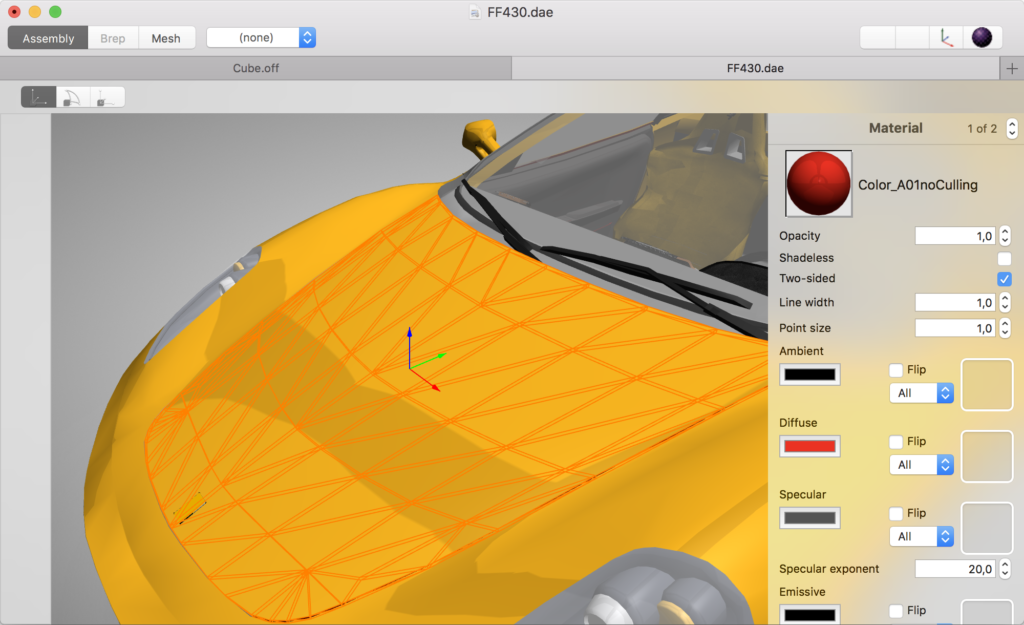
This also has the subtle effect of scene navigation working as expected. The object rotates around the center of the selection and not the center of the screen.
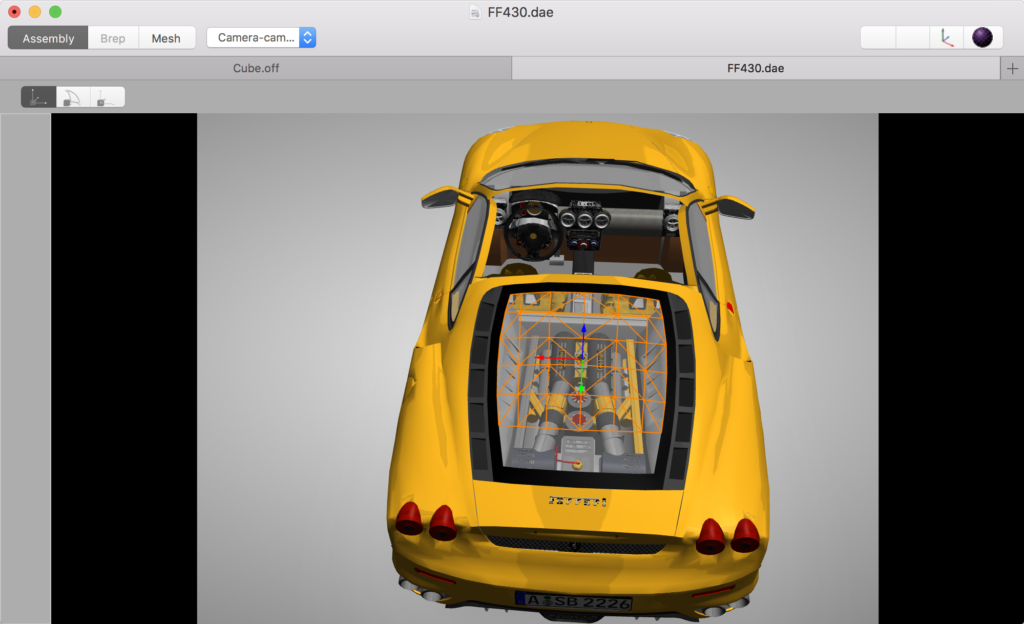
Things get tricky when using a pre-defined camera and not the user navigation camera. Such a camera has a fixed aspect ratio that needs to be fit into the interactive area.
The corrected version should look like the image below. Although we want overdraw under the controls, this should not change the fact that we want to see all of the camera view within the interactive area.
The Math
How is this done? First, let’s define three areas:
- The output rectangle
- The focus rectangle (=interactive area) within the output rectangle. This is used for interactions such as rotating the scene.
- The camera rectangle (=camera aspect ratio fitted within focus rectangle). This is used to draw the passe-partout.
So instead of defining overdraw explicitly, we do it implicitly by specifying where the non-overdraw area is. Regardless of overdraw, the output rectangle stays the same. The focus rectangle is defined by the caller. In the examples above, an invisible NSView has been added between the controls and its frame value is bound to the focus rectangle. If the inspector on the right is collapsed, the NSView is resized by the macOS layouting system and the focus rectangle automatically updates.
Shearing the Projection Matrix
The first thing to do is to apply a post-manipulation to the projection matrix. It must be scaled and translated such that the normal camera parameters (e.g. opening angle) apply to the area of the focus rectangle, not the output rectangle.
Math::Matrix4 View::calculateProjectMatrix() const
{
    // Adjust the projection matrix to match the aspect ratio of the view.
    auto const focusRect = getFocusRect();
    float const cameraAspectRation = _activeCamera->getAspectRatio();
    float const focusRectAspectRatio = focusRect.getWidth() / focusRect.getHeight();
    auto result = _activeCamera->getProjectionMatrix();
    if ( cameraAspectRation != focusRectAspectRatio )
    {
        if ( cameraAspectRation < focusRectAspectRatio )
        {
            // The focus rect is wider than the camera
            result = Math::Matrix4::scaling(Math::Vector3(cameraAspectRation / focusRectAspectRatio, 1.0, 1.0)) * result;
        }
        else
        {
            // The focus rect is higher than the camera
            result = Math::Matrix4::scaling(Math::Vector3(1.0f, focusRectAspectRatio / cameraAspectRation, 1.0)) * result;
        }
    }

    // If focus rect is set, scale and move the projection.
    if ( focusRect != _outputRect )
    {
        // Note the factor of 2 in the translation because the frustum is mapped to the unit cube, so it
        // goes from -1 to +1.
        Math::Vector2 const focusCenter(focusRect.getX() + focusRect.getWidth() / 2.0f, focusRect.getY() + focusRect.getHeight() / 2.0f);
        Math::Vector2 const viewCenter(_outputRect.getX() + _outputRect.getWidth() / 2.0f, _outputRect.getY() + _outputRect.getHeight() / 2.0f);
        Math::Vector3 const scalingFactor(focusRect.getWidth() / _outputRect.getWidth(), focusRect.getHeight() / _outputRect.getHeight(), 1.0f);
        Math::Vector3 const translationFactor(2.0f * (focusCenter[0] - viewCenter[0]) / _outputRect.getWidth(), 2.0f * (focusCenter[1] - viewCenter[1]) / _outputRect.getHeight(), 0.0f);
        result = Math::Matrix4::translation(translationFactor) * Math::Matrix4::scaling(scalingFactor) * result;
    }

    return result;
}
Calculating the Camera Rectangle
Now we can calculate the camera rectangle. Remember, this is the area not covered by the passe-partout. If the user navigation camera is used, we simply return the whole output area because we don’t need a passe-partout. If we have a pre-defined camera, it should return the rectangle that matches the camera perfectly.
void View::updateCameraRect()
{
    // If the user camera is active, use whole output view.
    if ( _activeCamera == _userCamera )
    {
        setCameraRect(_outputRect);
        return;
    }

    auto const focusRect = getFocusRect();
    float const cameraAspectRation = _activeCamera->getAspectRatio();
    float const focusRectAspectRatio = focusRect.getWidth() / focusRect.getHeight();
    if ( cameraAspectRation == focusRectAspectRatio )
    {
        // Use full focus rect.
        setCameraRect(focusRect);
    }
    else if ( cameraAspectRation < focusRectAspectRatio )
    {
        // The focus is wider than the camera
        auto const width = focusRect.getWidth() / focusRectAspectRatio * cameraAspectRation;
        auto const offset = (focusRect.getWidth() - width) / 2.0f;
        setCameraRect(Math::Rect(focusRect.getX() + offset, focusRect.getY(), width, focusRect.getHeight()));
    }
    else
    {
        // The output is higher than the camera
        auto const height = focusRect.getHeight() / cameraAspectRation * focusRectAspectRatio;
        auto const offset = (focusRect.getHeight() - height) / 2.0f;
        setCameraRect(Math::Rect(focusRect.getX(), focusRect.getY() + offset, focusRect.getWidth(), height));
    }
}
Conclusion
That’s it. Whenever user interaction is relevant, use the focus rectangle. When drawing the passe-partout, use the camera rectangle. By doing a post-manipulation of the projection matrix, all the normal camera parameters (e.g. aspect ratio, opening angle) still work as expected but the rendering area is extended. Took a bit of fiddling to get the math right but now it feels intuitive and “just right”. The user will probably never have a clue how much math is involved into producing what feels totally natural now!


Leave a Reply